Last updated on May 29th, 2025 at 10:03 am
Learn how to upload and store images directly into a MySQL database using PHP. This step-by-step guide covers everything from setting up the database to displaying the uploaded images. Ideal for developers working on user profile systems, content management systems, or any application requiring image storage.
- Prerequisites
- Step 1: Create the MySQL Database and Table
- Step 2: Create the HTML Upload Form
- Step 3: Handle the Upload with PHP
- Step 4: Display Uploaded Images
- Security Considerations
Prerequisites
Before you begin, ensure you have the following:
- A web server with PHP and MySQL installed (e.g., XAMPP, WAMP, LAMP)
- Basic knowledge of PHP and MySQL
- A code editor (e.g., VS Code, Sublime Text)
Step 1: Create the MySQL Database and Table
First, create a database named image_upload_db and a table named images to store the image data.
SQL Query:
CREATE DATABASE image_upload_db;
USE image_upload_db;

CREATE TABLE images (
    id INT AUTO_INCREMENT PRIMARY KEY,
    title VARCHAR(100) NOT NULL,
    mime_type VARCHAR(50) NOT NULL,
    image_data MEDIUMBLOB NOT NULL,
    uploaded_on TIMESTAMP DEFAULT CURRENT_TIMESTAMP
);
This table includes fields for the image title, MIME type, binary image data, and the upload timestamp
Step 2: Create the HTML Upload Form
Next, create an HTML form (index.html) that allows users to upload images.
<!DOCTYPE html>
<html>
<head>
    <title>Upload Image to MySQL</title>
</head>
<body>
    <h2>Upload Image</h2>
    <form action="upload.php" method="post" enctype="multipart/form-data">
        <label for="title">Image Title:</label>
        <input type="text" name="title" id="title" required><br><br>
        <label for="image">Select Image:</label>
        <input type="file" name="image" id="image" accept="image/*" required><br><br>
        <input type="submit" name="submit" value="Upload">
    </form>
</body>
</html>
This form collects the image title and the image file from the user
Step 3: Handle the Upload with PHP
Create a PHP script (upload.php) to process the form submission and store the image in the database.
<?php
if ($_SERVER['REQUEST_METHOD'] == 'POST') {
    // Database configuration
    $host = 'localhost';
    $db = 'image_upload_db';
    $user = 'root';
    $pass = '';
    $charset = 'utf8mb4';

    // Create a new PDO instance
    $dsn = "mysql:host=$host;dbname=$db;charset=$charset";
    try {
        $pdo = new PDO($dsn, $user, $pass);
    } catch (PDOException $e) {
        die("Database connection failed: " . $e->getMessage());
    }

    // Validate and sanitize input
    $title = filter_input(INPUT_POST, 'title', FILTER_SANITIZE_STRING);
    if (empty($title)) {
        die("Image title is required.");
    }

    // Check if file was uploaded without errors
    if (isset($_FILES['image']) && $_FILES['image']['error'] == 0) {
        $fileTmpPath = $_FILES['image']['tmp_name'];
        $mimeType = mime_content_type($fileTmpPath);
        $allowedMimeTypes = ['image/jpeg', 'image/png', 'image/gif'];

        if (in_array($mimeType, $allowedMimeTypes)) {
            $imageData = file_get_contents($fileTmpPath);

            // Prepare the SQL statement
            $sql = "INSERT INTO images (title, mime_type, image_data) VALUES (:title, :mime_type, :image_data)";
            $stmt = $pdo->prepare($sql);
            $stmt->bindParam(':title', $title);
            $stmt->bindParam(':mime_type', $mimeType);
            $stmt->bindParam(':image_data', $imageData, PDO::PARAM_LOB);

            // Execute the statement
            if ($stmt->execute()) {
                echo "Image uploaded successfully.";
            } else {
                echo "Failed to upload image.";
            }
        } else {
            echo "Only JPG, PNG, and GIF files are allowed.";
        }
    } else {
        echo "Error uploading file.";
    }
} else {
    echo "Invalid request.";
}
?>
This script connects to the database, validates the uploaded file, and stores the image data along with its title and MIME type.
Step 4: Display Uploaded Images
Create a PHP script (display_images.php) to retrieve and display the uploaded images.
<?php
// Database configuration
$host = 'localhost';
$db = 'image_upload_db';
$user = 'root';
$pass = '';
$charset = 'utf8mb4';

// Create a new PDO instance
$dsn = "mysql:host=$host;dbname=$db;charset=$charset";
try {
    $pdo = new PDO($dsn, $user, $pass);
} catch (PDOException $e) {
    die("Database connection failed: " . $e->getMessage());
}

// Fetch images from the database
$sql = "SELECT id, title, mime_type, image_data FROM images ORDER BY uploaded_on DESC";
$stmt = $pdo->prepare($sql);
$stmt->execute();
$images = $stmt->fetchAll(PDO::FETCH_ASSOC);
?>

<!DOCTYPE html>
<html>
<head>
    <title>Uploaded Images</title>
</head>
<body>
    <h2>Uploaded Images</h2>
    <?php if ($images): ?>
        <?php foreach ($images as $image): ?>
            <div>
                <h3><?php echo htmlspecialchars($image['title']); ?></h3>
                <img src="data:<?php echo $image['mime_type']; ?>;base64,<?php echo base64_encode($image['image_data']); ?>" alt="<?php echo htmlspecialchars($image['title']); ?>" width="300">
            </div>
            <hr>
        <?php endforeach; ?>
    <?php else: ?>
        <p>No images found.</p>
    <?php endif; ?>
</body>
</html>
This script retrieves all images from the database and displays them on the page using base64 encoding.
Security Considerations
- File Validation: Always validate the MIME type of uploaded files to prevent malicious uploads.
- Prepared Statements: Use prepared statements to protect against SQL injection attacks.
- File Size Limits: Implement file size checks to prevent large uploads that could exhaust server resources.
- Error Handling: Implement robust error handling to provide meaningful feedback to users.
Storing images in a MySQL database using PHP is straightforward when following best practices. While storing images directly in the database can be suitable for small applications, consider storing images on the filesystem or a cloud storage service for larger applications to improve performance and scalability.

Thx for this great example! It really works (except the Create-Table-Stmt … ther’s a ‘)’ to much). But anyway – yesterday I’ve spent hours to find out, why my similar script with PHP5.3 and MySQL did not work. You had the solution! Thanks a lot! It’s really a great Script.
how to retrive the images in to my webpage from data base?
thanks
Hello Rajesh,
I have added that section in the code now. It is very easy instead of dynamically adding the image ID in the A HREF tag we can use IMG SRC instead. and call the image..
Hi.. I am stuck and I’m a total newbie at php / mysql .. Would be grateful if someone could help me .. how do I add a function to update the title belonging to the individual picture? Thanks in advance! 🙂
Hello Paso,
First of all thank you very much for your comment. Sorry i didn’t exactly understood what you really need but i think you are asking about image title attribute. If that is the case then all you have to do is change the code where we retrieve image from Mysql
echo "<img width='100' src='".$_SERVER['PHP_SELF']."?show=$id'><br><a href='".$_SERVER['PHP_SELF']."?show=$id'>{$title}</a> – ";To
echo "<img title='".$title."' width='100' src='".$_SERVER['PHP_SELF']."?show=$id'><br><a href='".$_SERVER['PHP_SELF']."?show=$id'>{$title}</a> – ";If otherwise please let me know?
Thanks for your quick reply .. I was not clear enough in my question .. sorry ..
I need help with an update function ..
Instead of deleting a photo and upload it again “just because I need to change the imagetitle or text “I just want to be able to update these title/text-rows !? But I do not know how! 🙁
I guess it could look like this ..
        if (isset ($ _POST [‘update’])) // If used selected some photo to update
        {// In ‘uploaded images form’;
            $ id = intval ($ _POST [‘update’]);
            mysql_query (“UPDATE {$ table} SET title = ‘$ title’, text = ‘$ text’ WHERE id = $ id”);
            $ msg = ‘ Title and Text updated ‘;
        }
I hope you now understand what I mean! 🙂
Sorry for my very bad explanation .. that I would need help with is …
I guess it could start with this? 😉
mysql_query (“UPDATE {$ table} SET title, text WHERE id = $ id”)
I hope you understand what I am looking for and can help me !? 🙂
Not a problem, All you need to do is create a html form and use 2 input fields one for new title and other for old. Hide the old title input field using simple css.
Once all set, Use the below mysql query inside the php code that has the GET or POST functionality.
Now it was a while since I tried to get my problem solved .. Thanks for your help so far .. But I soon give up .. I’ve tried making a new form and do as you said .. but nothing I do seems to work ! I’m doing something wrong! ” .. Can you please show me how to do this? Pleeeease !! 🙂 I would really appreciate it!
I just want to update the title and the text belonging to my pictures!
I’m pretty annoyed at myself right now !! I mean .. how hard can it be? 🙂
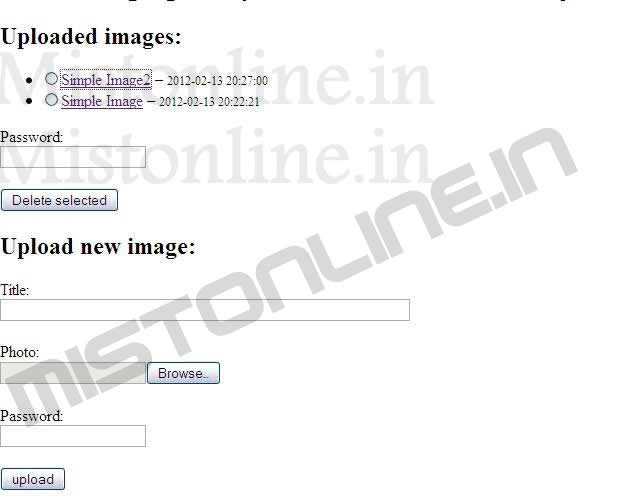
where the uploaded photos will be displayed?
Please refer previous comment. I have updated the code accordingly. It will display the images in the “Uploaded Images” section. Please test it from your side.
Thanks dear.
Superb. Thanks a lot.
I want able to change photo and title. i follow above comment but still not success.. can you send me the complete code for able to change photo and title.. Thanks
how to change existing photo?
thanks for this tutorial
which code editor do you use to write code???its very nice.
My thumbnails display a broken image and when I click on the link it tells me it cannot be displayed because it contains errors. Any suggestions would be greatly appreciated! Thank you
Hello Deanna,
Thanks for your comment. Happy to see that you have implemented one of our scripts on your page 🙂
Please let me know in detail the error you are seeing?
Regards
Admin
I like this source code : visit my shopping site that is developed by me.