
Have you ever wished you could wrap a few lines of Python into something smarter—something that plays nicely with LLMs and developer tools like Amazon Q Developer or Cline? That’s where FastMCP comes in.
In this post, we’ll build a super-lightweight MCP server using fastmcp, and run it using sse(Server-Sent Events). You may also run it as STDIO or HTTP. Any LLM agent or a custom client that knows how to speak MCP will be able to connect successfully to our MCP server.
Let’s get right into it.
- What Is FastMCP, in Simple Terms?
- Installing FastMCP
- Writing Your First MCP Tool
- Running the MCP Server
- How LLM Clients Use This
- Add More Tools
- Why This Rocks
- Final Thoughts
What Is FastMCP, in Simple Terms?
fastmcp is a tiny Python framework that lets you expose your functions as tools over a Machine Context Protocol (MCP) interface. Tools can be called by AI agents like Amazon Q Developer on the command line , Cline, or any LLM with MCP support.
The best part? It requires almost no boilerplate. Write a function, decorate it, and you’re done.
Installing FastMCP
To get started, make sure you have Python 3.10+ installed, All versions of fastmcp depend on Python>=3.10
pip install fastmcp
That’s it.
Writing Your First MCP Tool
Create a file called run.py:
from fastmcp import FastMCP

mcp = FastMCP()

@mcp.tool(name="greet", description="Say hello to someone")
def greet(name: str) -> str:
    return f"Hey {name}, how's it going?"

if __name__ == "__main__":
    try:
        mcp.run()
    except Exception as e:
        import traceback
        print("An error occurred while running the MCP stdio server:")
        traceback.print_exc()
You’ve just defined an MCP tool named greet. When an LLM (or human) calls this tool, it’ll receive a friendly response.
Running the MCP Server
FastMCP supports multiple transport modes to fit different environments:
- STDIO (default): Ideal for local development, CLI tools, and integration with tools like Amazon
qdeveloper orcline.mcp.run(transport="stdio") # Optional, since this is the default - Streamable HTTP: Best suited for web-based deployments where you need HTTP endpoints.
mcp.run(transport="http", host="127.0.0.1", port=8000, path="/mcp") - SSE (Server-Sent Events): Useful when working with clients that expect streaming responses over SSE.
mcp.run(transport="sse", host="127.0.0.1", port=8000)
if __name__ == "__main__":
    mcp.run(transport="sse", host="127.0.0.1", port=8000)
This configures a basic SSE server that listens on the local interface. To allow access from other devices, change the address to 0.0.0.0 so the server listens on all network interfaces.
For example, when you start the server we will see similar messages
[07/21/25 19:20:30] INFO     Starting MCP server 'FastMCP' with transport 'sse' on http://127.0.0.1:8000/mcp      server.py:1448
INFO:     Started server process [1865075]
INFO:     Waiting for application startup.
INFO:     Application startup complete.
INFO:     Uvicorn running on http://127.0.0.1:8000
Simple, clean, and totally LLM-ready.
How LLM Clients Use This
Create a mcp.json file like the one below and save the configuration. If you are using Amazon Q Developer put this file under ~/.amazonq/ directory
{
  "mcpServers": {
    "mcp-server-test": {
      "autoApprove": [
        "greet"
      ],
      "disabled": false,
      "timeout": 60,
      "transport": "sse",
      "url": "http://127.0.0.1:8000/mcp/"
    }
  }
}
At the time of this writing, the Amazon Q Developer CLI does not support a url field in its MCP configuration. – More details https://github.com/aws/amazon-q-developer-cli/issues/2096
Now when you open a session in cline, you’ll be able to call greet directly like so:
> greet Alex
Hey Alex, how's it going?
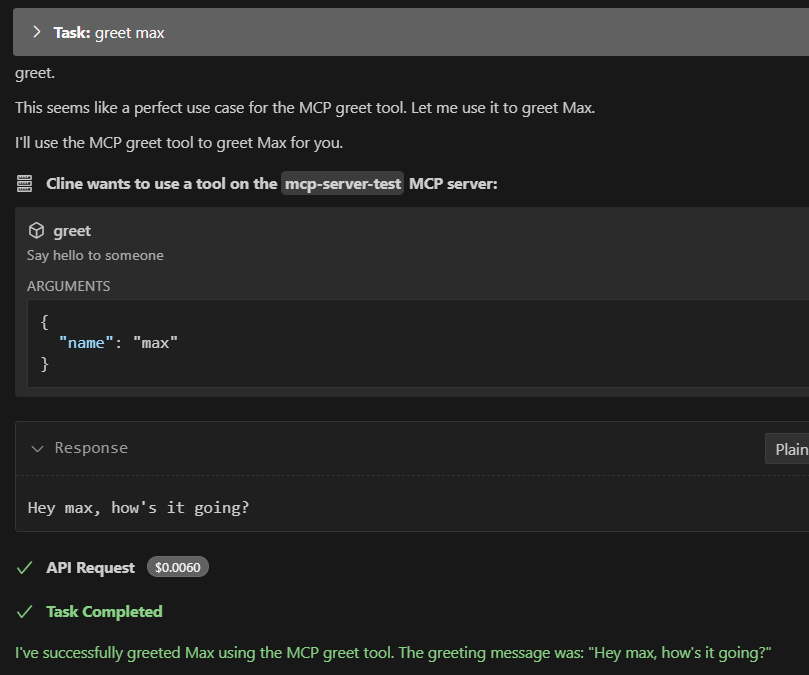
Boom. You’ve just added your own brainpower to the LLM.
In the server logs, look for output resembling the following:
INFO:     96.x.x.x:54830 - "POST /messages/?session_id=b1708d97a5e54a7289e054a0f2289e60 HTTP/1.1" 202 Accepted
INFO:     96.x.x.x:54831 - "POST /messages/?session_id=b1708d97a5e54a7289e054a0f2289e60 HTTP/1.1" 202 Accepted
INFO:     96.x.x.x:54840 - "GET /mcp HTTP/1.1" 200 OK
Add More Tools
You’re not limited to one tool. Just keep decorating functions in your tools.py file:
@mcp.tool(name="add", description="Add two numbers")
def add(x: float, y: float) -> float:
    """Adds two numbers."""
    return x + y
Now both greet and add are available to the LLM or any MCP-aware client.
Why This Rocks
- No HTTP server required
- Zero external dependencies (just
fastmcp) - Perfect for quick experiments or private LLM agents
- Stdio interface works anywhere—even inside
docker, AmazonQ developer, or terminal tools
You can even run this on a Raspberry Pi or inside a Docker container for extra isolation.
Final Thoughts
MCP tools let you extend the capabilities of AI agents with your own logic. And with fastmcp, it’s never been easier to go from idea to live tool.
Start with a couple of functions, test locally, then plug into your favorite LLM interface. It’s like writing your own ChatGPT plugins—but faster, leaner, and totally under your control.
