Last updated on August 29th, 2024 at 11:49 am
Millions of websites are hosted on Cloudflare DNS. One of the major challenge for webmasters is to find a way to integrate domains already in Cloudflare with certain AWS services.
In this tutorial we are going to retain all the DNS configuration in Cloudflare itself. We are going to dive deep on to adding API Gateway custom domain endpoint as a CNAME in Cloudflare . No need to migrate your website to Route53 or do some complex workaround anymore.
Where to Start ?
There are lot of moving parts here. In order to make things easier I am going to provide step by step instruction with screenshot on how to successfully configure AWS API Gateway with domain hosted in Cloudflare. Here is the break down of the steps we are going to take
- Login to Cloudflare dashboard and create certificate
- Import Certificate using ACM (AWS Certificate Manager)
- Let us create custom domain in AWS API Gateway
- Go back to Cloudflare DNS dashboard of your website and update or create a CNAME .
Throughout the process domain we are going to use is cloudflareaws.theopsmind.com hosted on Cloudflare.
Step 1 : Login to Cloudflare dashboard and create certificate
- Go to the website you want to configure in the dashboard
- As shown below under SSL/TLS section click on Origin Server
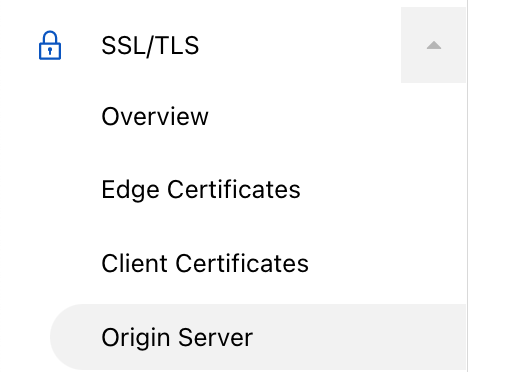
- Then “Create Certificate”
- Leave everything default as shown. In case if you would like to add anything specific for hostnames section add it accordingly.
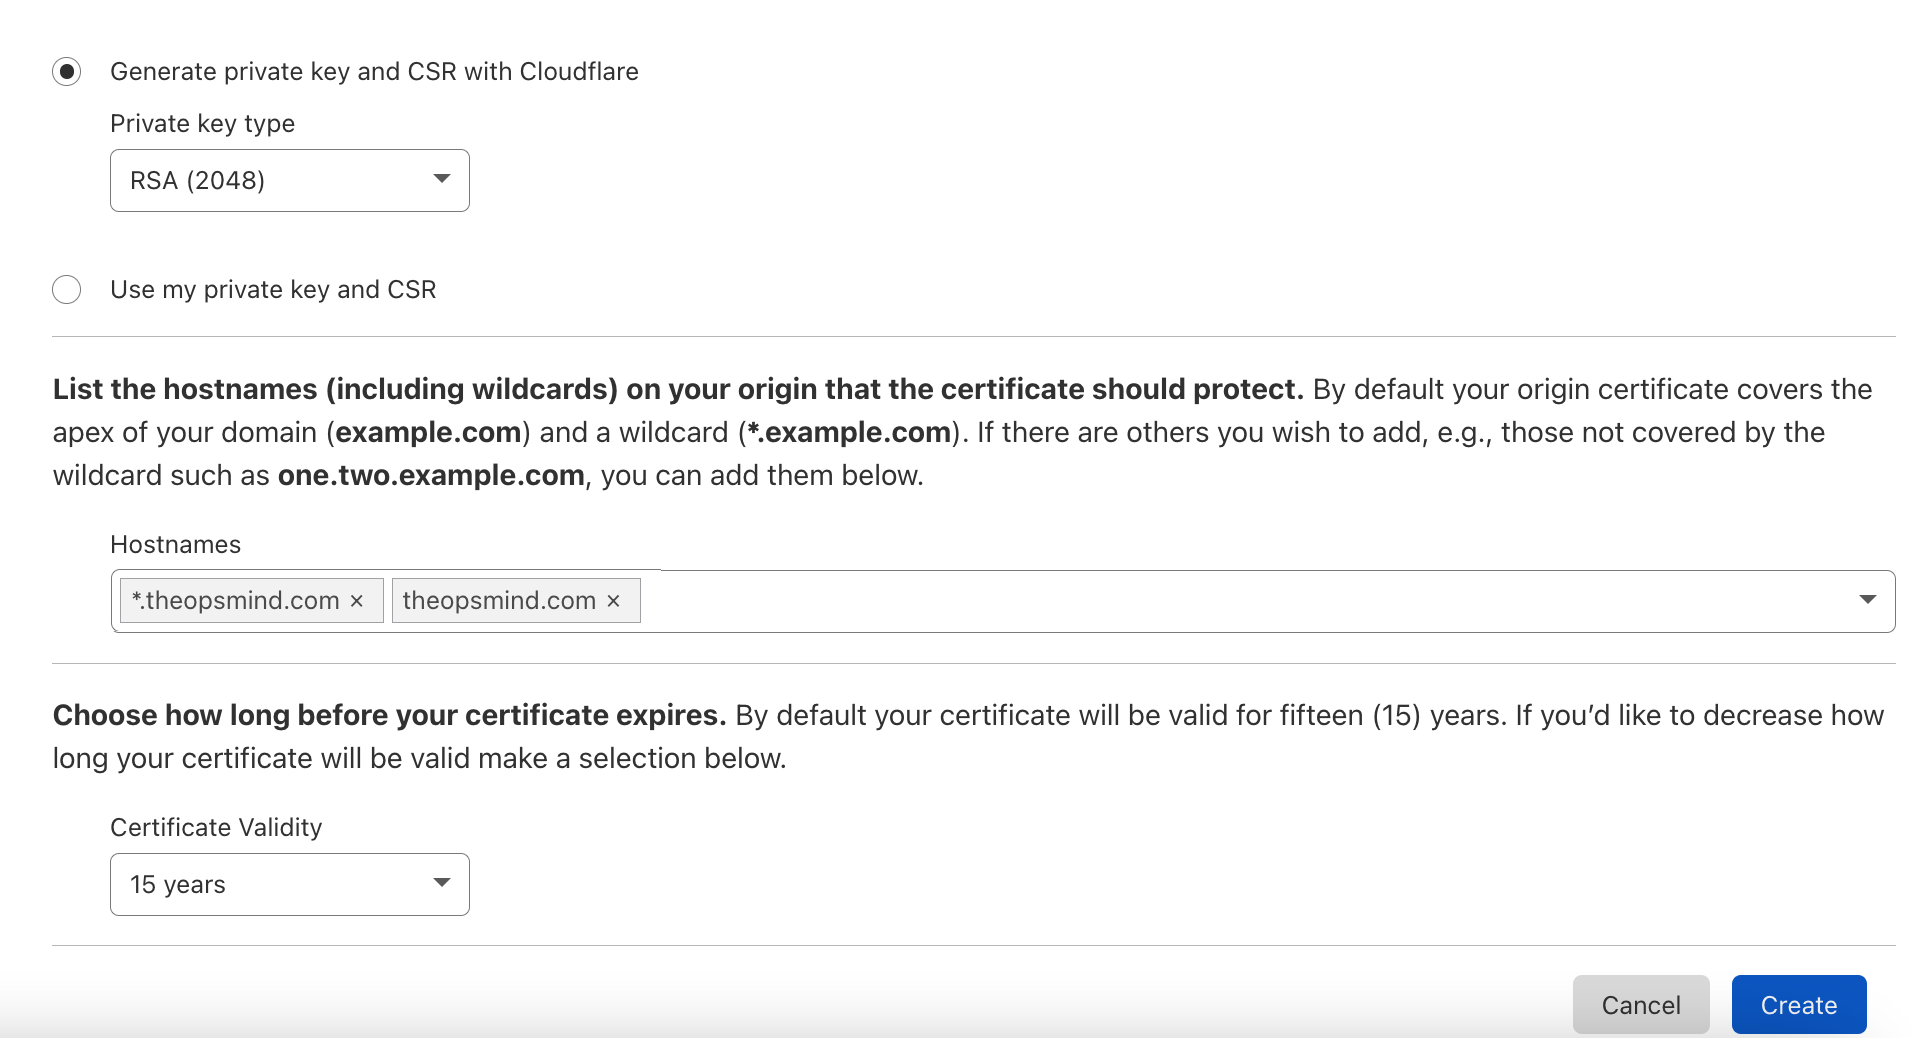
- Once everything is verified, hit the Create button
- You should now get Origin Certificate and Private key in the next window, It should be in PEM format. Make sure to copy the content of both and save it somewhere, may be in a text file.
- Go to this Cloudflare public document then Step 4 , download Cloudflare Origin RSA PEM . This is the Cloudflare Origin CA root certificate. We need this to be imported to AWS Certificate Manager along with the other 2 certificates
Now we have 3 certificates handy
- OriginCertificate (Got from the dashboard)
- PrivateKey (Got from the dashboard)
- Origin CA Root Certificate (Content of Cloudflare Origin RSA PEM file, got from the public documentation.)
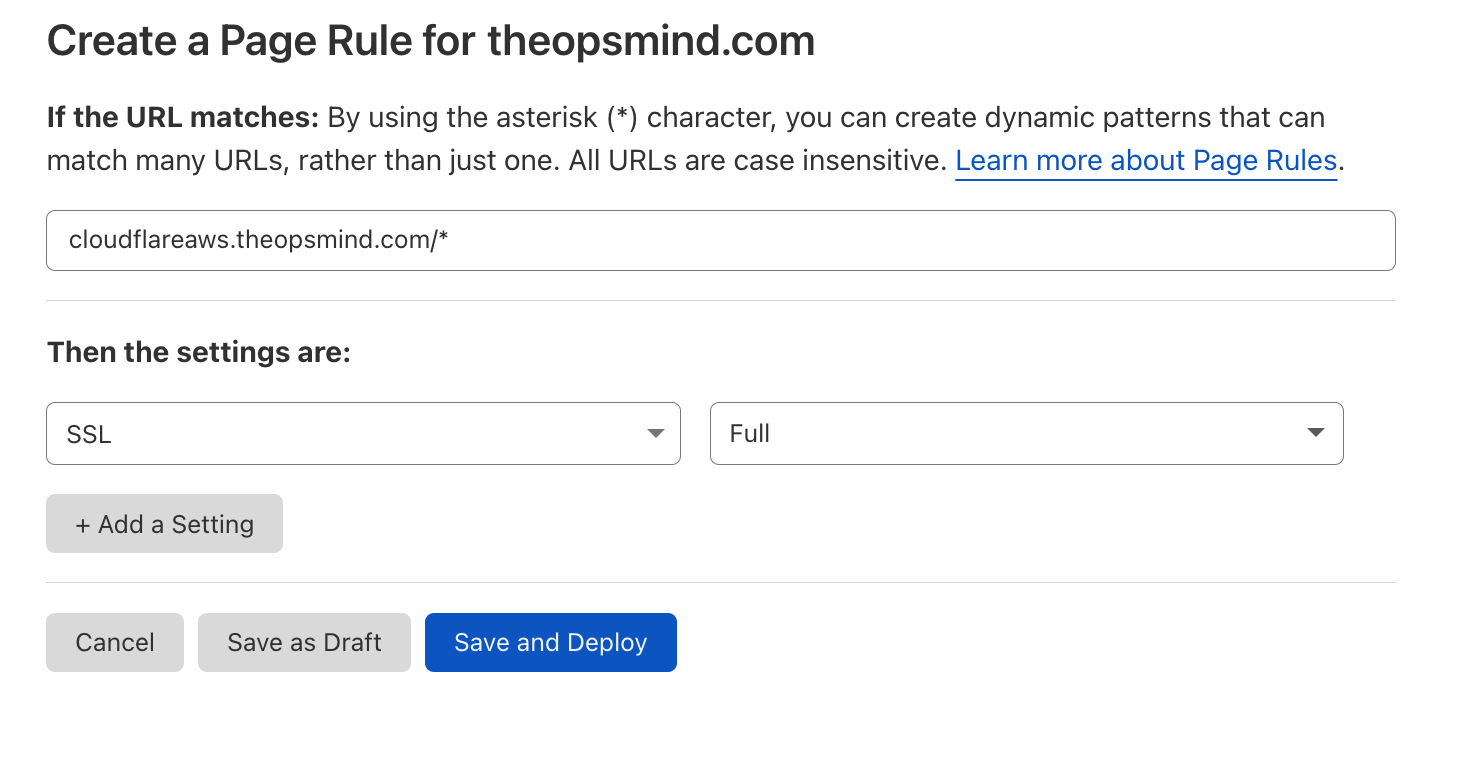
Create Page Rule
Important Once done with above the last step we have to do on Cloudflare dashboard is , Go to page rules and add a rule for the domain that you would like to integrate with API Gateway by selecting SSL setting as FULL. Click Save and Deploy
Step 2 : Import Certificate using ACM (AWS Certificate Manager)
- Go To ACM Certificate creation page in AWS Console, I am using us-east-1
- Click IMPORT
- In the Certificate body copy and paste the content from OriginCertificate
- In the Certificate private key copy and paste the content from PrivateKey
- In the Certificate chain which is an optional section we have to copy and paste the content from Origin CA Root Certificate
- Click Next and add tags accordingly
- Verify everything and hit Import, Take a look at the services integrated with AWS Certificate Manager
- You should get this message on successful import ,
Successfully imported certificate with ID xxxxxxx-xxxx-xxxx-xxxx-xxxxxxxxx. You have successfully imported a certificate into your account in AWS Certificate Manager. No further action is needed at this time.
Public certificates provisioned through ACM are free. But take a look at this documentation for more details about ACM pricing.
Step 3 : Let us create custom domain in AWS API Gateway
- Go To custom domain creation page in AWS Console
- Provide the domain name, I am using cloudflareaws.theopsmind.com. You should use your own.
- Leave everything default and select the ACM certificate we created for this domain in Step 1
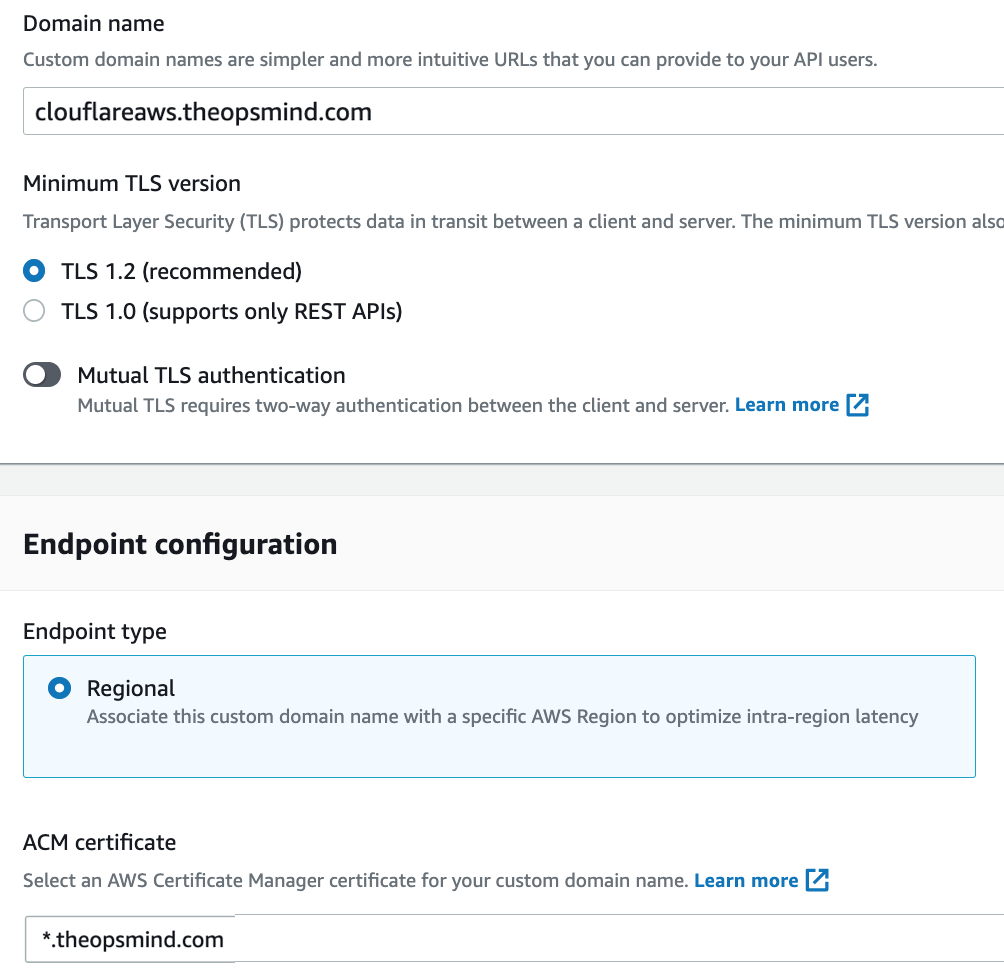
- Click on Create domain name
- Map the API Gateway you would like to configure with the custom domain you just created by going to Configure API Mappings
- Copy the API Gateway domain name under the Configurations tab.

Step 4 : Go back to Cloudflare DNS dashboard of your website and update or create a CNAME .
In my case CNAME is cloudflareaws for domain theopsmind.com. I pointed that to my AWS API Gateway domain name.

The same endpoint that we get from the Configurations tab in Step 3 (shown in the screenshot).
All done now hit the new subdomain you have created and see that it works. Check this demo URL that we configured
You may also check out our tutorial on How to build serverless web app in Python using AWS Lambda API (Demo URL in this tutorial is also configured using the above steps)
